In the latest version of CanKing (v6.6), a new DBC Formatter has been included. We will here take a look at this formatter and see how it can be used to show signal values in the output window of CanKing. We will be using the Kvaser Virtual CAN Driver, so no interface is needed to follow along.
Developer Blog
Database formatter in CanKing
Configure CanKing to use Kvaser Virtual CAN Driver 1 and 2
Start CanKing and create a new project using Template and click OK. Among the templates, select 2 CAN channels from the Standard tab and click OK. Make sure that two virtual channels from the same virtual device is selected (0 – Kvaser Virtual CAN Driver and 1 – Kvaser Virtual CAN Driver) and that the CAN mode and bus parameters are set identically.
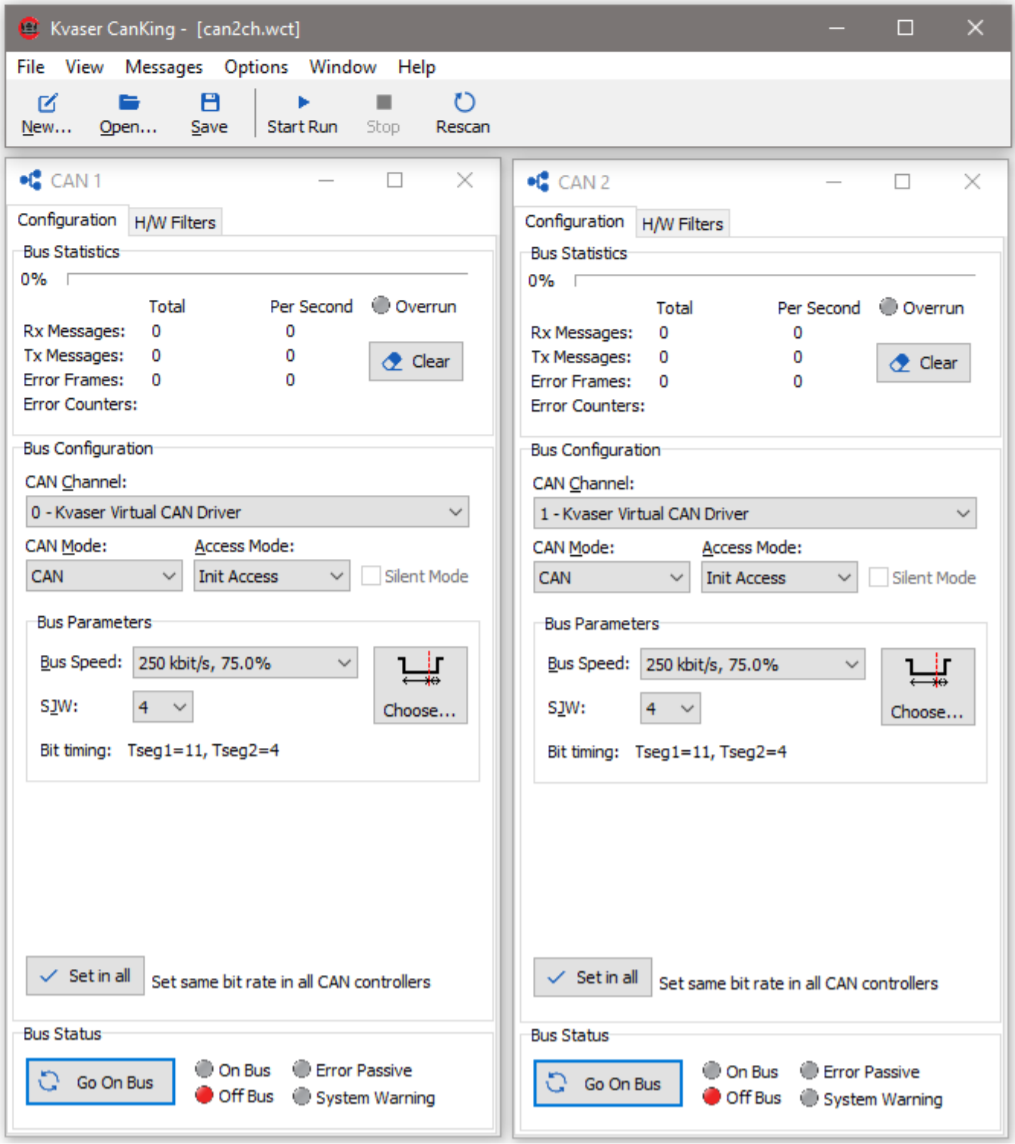
Figure 1: Select virtual device channels and make sure the Bus Configuration match between the channels in the CAN 1 and CAN 2 windows.
Configure CanKing formatters
Go to the Select formatters window. This can be done by selecting Select formatters from the Window menu. If the Select formatters window is not available, make sure the window is enabled in the View menu.
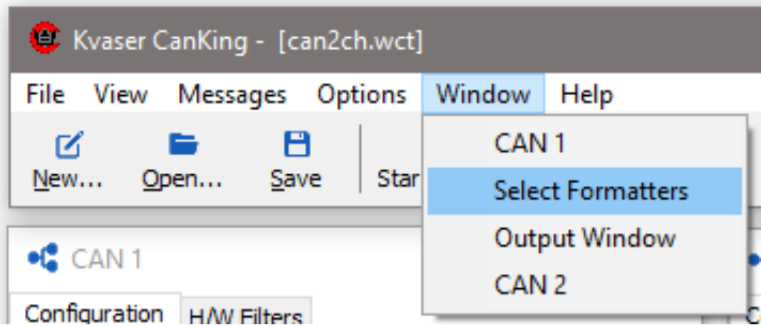
Figure 2: Bring the Select formatters window into focus.
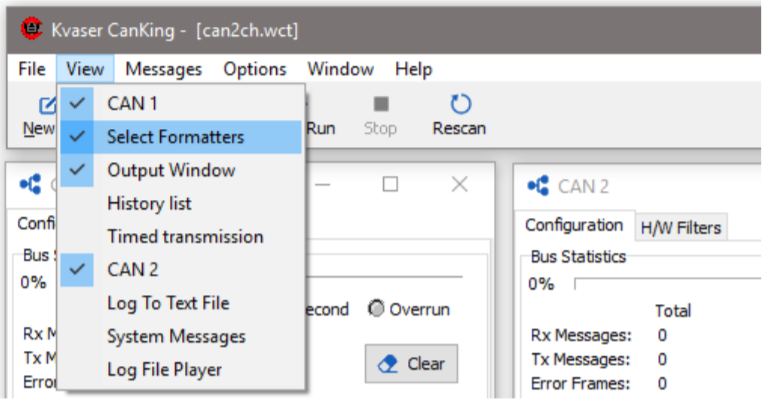
Figure 3: Open the Select formatters window from the View menu.
Remove the default Standard Text Format formatter by selecting it in the list of active formatters and click Remove. If the default formatter is not removed, we would end up with duplicated messages in the output window. Select DBC Formatter from the available formatters and click Use. To configure the newly added DBC formatter, select the formatter in the list of active formatters and click the Options button. Here we can choose what databases to use for the channels configured in the two windows CAN 1 and CAN 2. Press the open button for CAN 1 and select the ‘ExampleDatabase.dbc‘1 . We deselect Show data since we are not interested to see the full data of the CAN message. Click OK when done. We also add a Direction Filter to the active formatters since we are not interested in both TX and RX messages. Note that the order of active formatters does matter and it is a good practice to do the filtering first. So we move the direction filter to the top of the active formatters by selecting it and click Up.
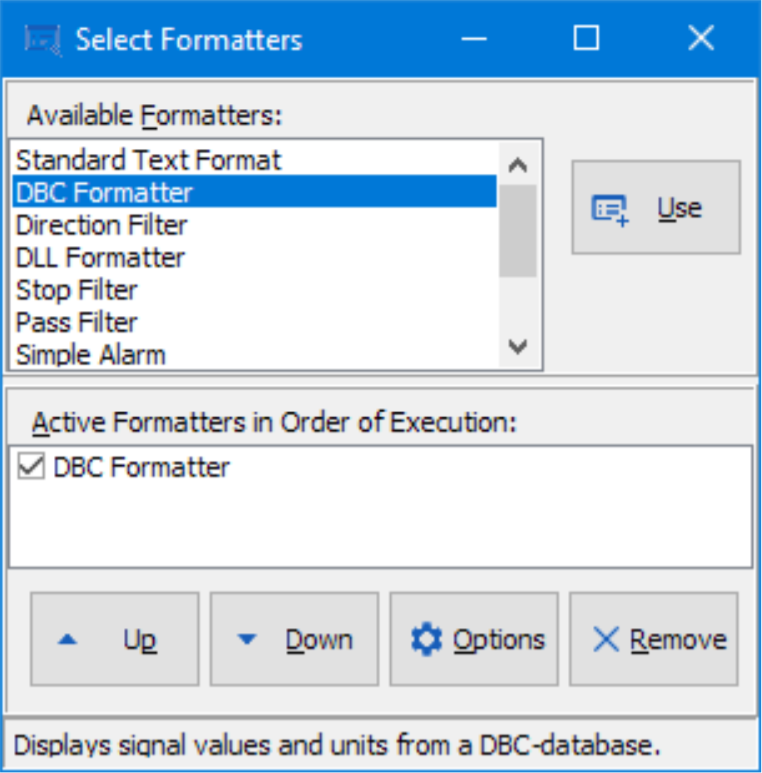
Figure 4: Replace the Standard Text Formater with the DBC Formatter in the Active Formatters list
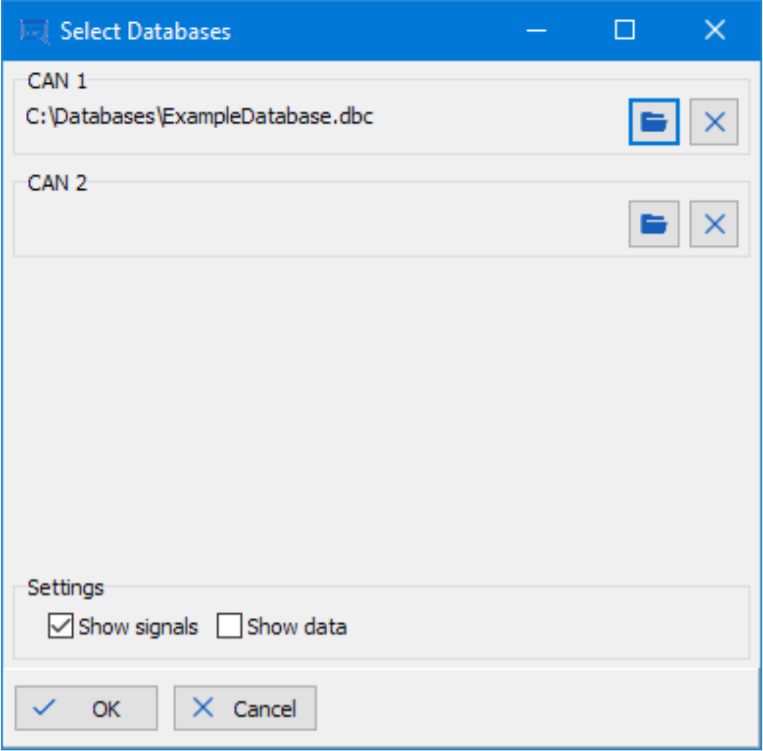
Figure 5: The DBC Formatter option window
Fixed positions in CanKing output window
When working with database files and signals it is often useful to use the Fixed Positions option in the output window. Instead of showing a scrolling list of messages, each CAN message will be shown in a fixed position with respect to
their CAN identifier and new messages will overwrite old messages with the same identifier. Right click in the data area of the output window and select Fixed Positions.
Configure generation of data
Now it is time to generate some data that matches our selected database with the Traffic Generator (aka CAN Bus Loader). Since the database contains messages with CAN identifiers from 0 to 6 we configure the Traffic Generator to generate messages with the same range of ids. Open the Traffic Generator, which can be found under the Messages menu in the main window, and select the Id tab. In the CAN Identifier frame, set lowest to 0 and highest to 6. Make sure Use extended (29-bit) identifiers is unchecked since our database uses standard identifiers.
Go to the Data tab and select Random data and make sure Random length is unchecked. While we are here, we also go to the Options tab and check the Start automatically on “Start Run” checkbox. This is a convenience feature that will start and stop the traffic generator when the Start Run and Stop buttons in the main window are pressed.
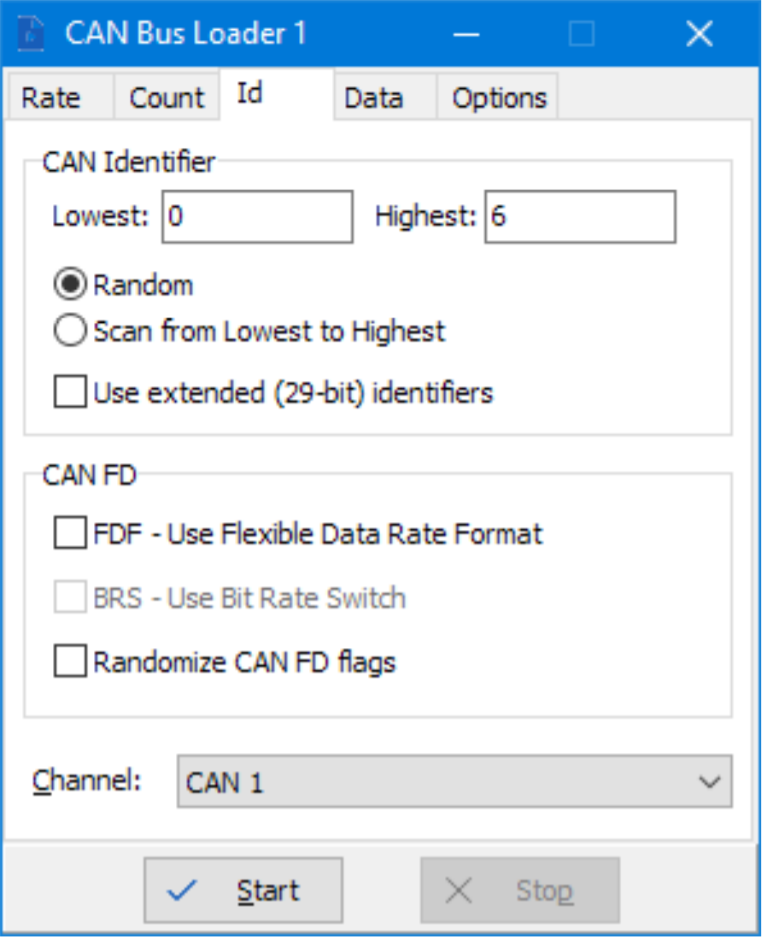
Figure 6: Configure the Traffic generator to generate messages with CAN identifiers 0 to 6.
Generate traffic
We are now ready to start generating traffic. Press Start run in the main window to get the CAN controllers on-line and the traffic generator to start generating messages.
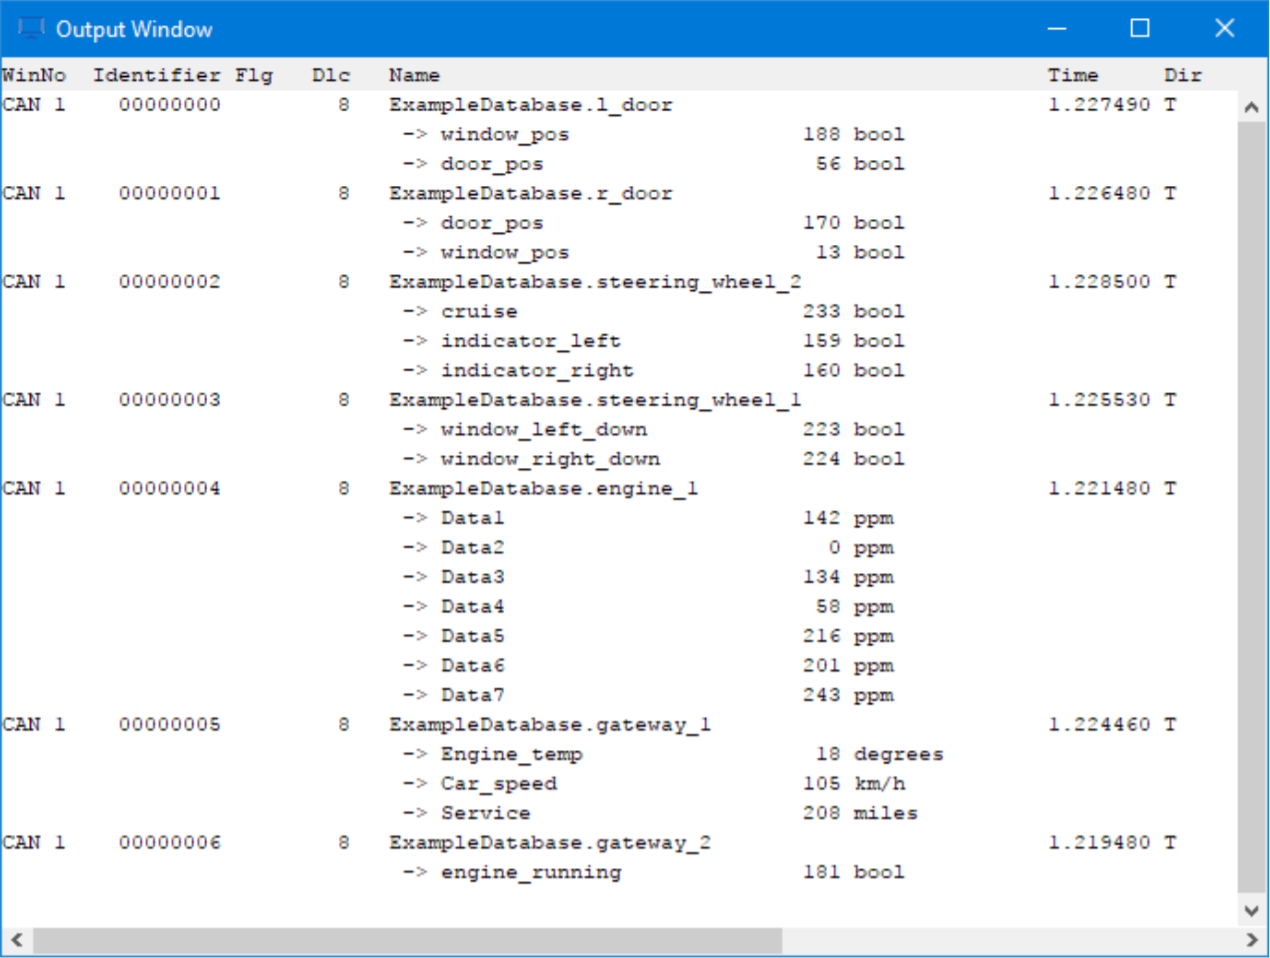
Figure 7: Resulting output window showing signal values according to selected database.
Hopefully this article gave you some insight in the workings of filtering in CanKing. If you have any questions or feedback please feel free to e-mail them to support@kvaser.com.
1 ‘ExampleDatabase.dbc’ can be downloaded from https://www.kvaser.com/wp-content/uploads/2018/04/exampledatabasedbc.zip.

