 |
|
This tutorial will take you through setting up a Visual Studio 2017 project and creating an application that will be able to list connected devices.
In this section we will enable the usage of Kvaser CANlib in Visual Studio 2017 when creating a C++ project which can be used to build both WIN32 and WIN64 applications. We will also handle the platform settings: x86 and x64.
First we must have the "Kvaser Drivers for Windows" and "Kvaser CANlib SDK" installed, see Installing on Windows for details on how to download and install these.
Now we are ready to start Visual Studio 2017 (C++) and create our project (I am using "Microsoft Visual Studio Professional 2017").
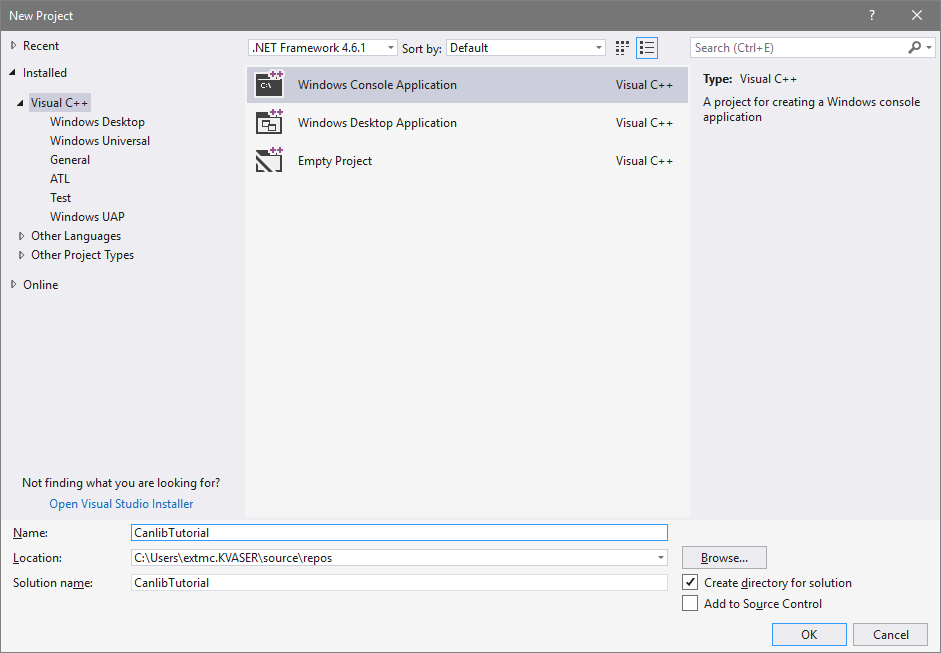
After starting Visual Studio 2017 (C++), we create a new project by selecting "File–>New->Project...". Choose to create a "Windows Console Application, Visual C++", name it "CanlibTutorial" (the Solution will now also be named "CanlibTutorial"), and press "OK".
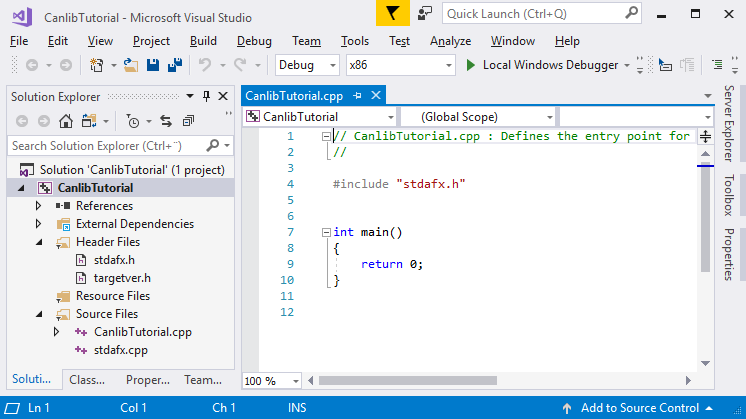
You will now be given an empty main function that does nothing.
Now we need to do five things to add CANlib so that we can build the project:
#include "canlib.h"We start by opening "Project->CanlibTutorial Properties..." and in the drop down for "Configuration" we select "All Configurations".
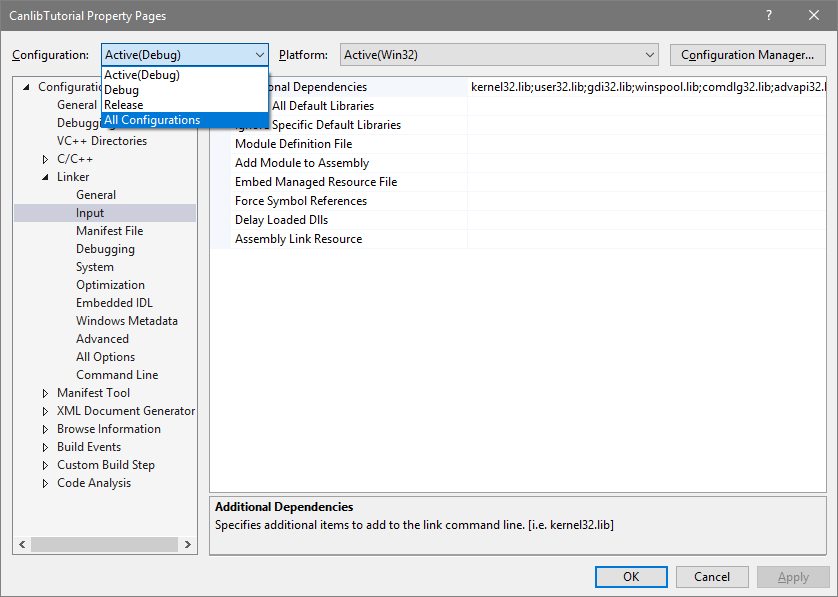
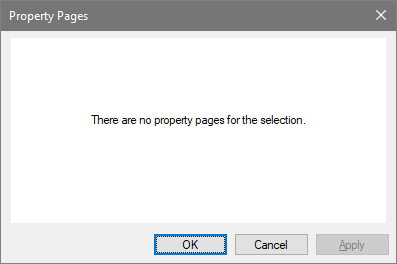
We also do the same for the next drop down selector "Platform" where we select "All Platforms". This might trigger a pop-up informing us that "There are no property pages for the selection".
Press OK and reopen the properties once again using "Project->CanlibTutorial Properties...", in the left pane select "Linker" and then "Input". Now click in the text field to the right of "Additional Dependencies", this will reveal a drop down menu which we select, revealing an <Edit...> text which we click on.
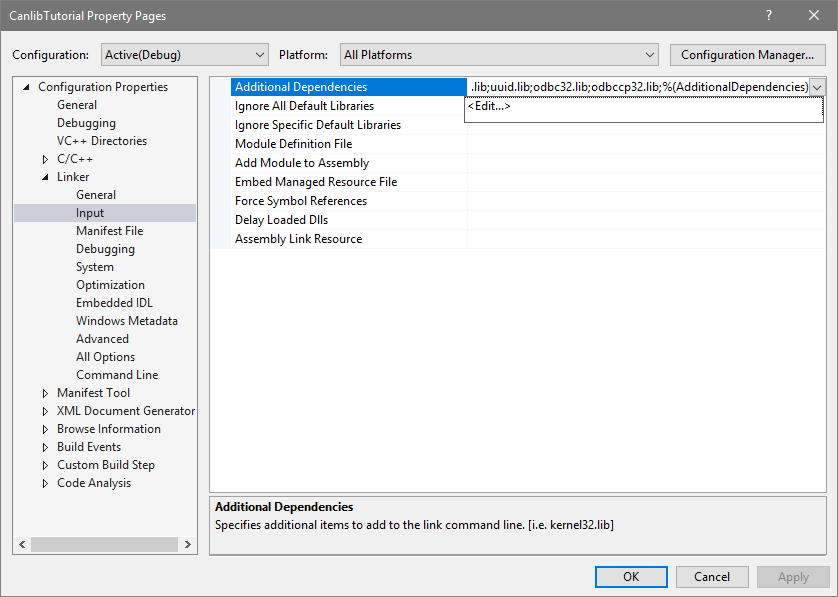
This opens up the "Additional Dependencies" where we add "canlib32.lib" in the top text box and press OK.

When the pop-up has been closed, we can now verify that "canlib32.lib" has been added to the "Additional Dependencies" field.
The next step is to add the path to canlib.h. On my machine I installed Kvaser CANlib SDK to "D:\CanlibSDK\CanlibSDK_5.26" (default is "C:\Program Files (x86)\Kvaser\Canlib"), which means that "canlib.h" can be found in "D:\CanlibSDK\CanlibSDK_5.26\INC" (default would be "C:\Program Files (x86)\Kvaser\Canlib\INC").
Once again open up the Property pages (using "Project->CanlibTutorial Properties...") and in the left pane select "C/C++" and "General". Click in the value field for "Additional Include Directories" and add the path to "canlib.h", in my case "D:\\CanlibSDK\\CanlibSDK_5.26". Now press Apply.

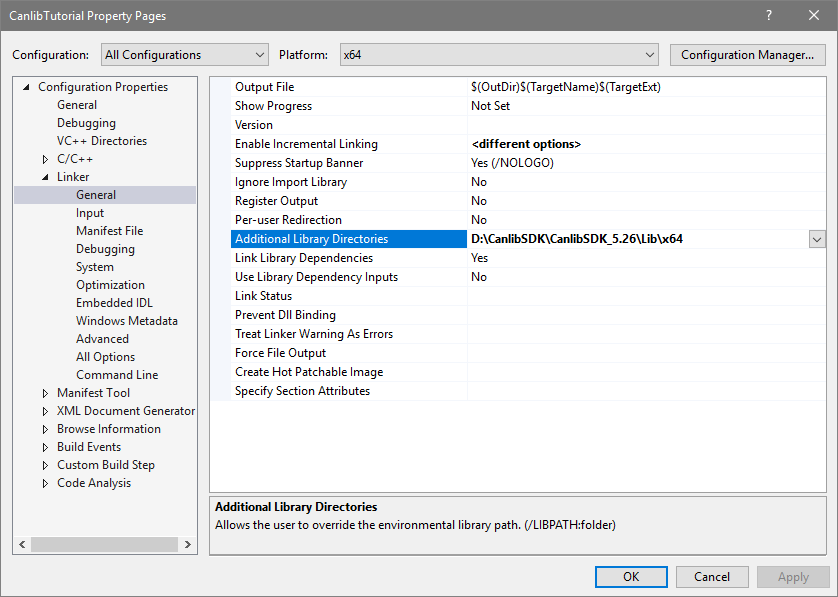
From the "Platform" drop down selector, select "Win32", which once again closes our window with the pop-up informing us that "There are no property pages for the selection". Press OK and reopen the properties once again using "Project->CanlibTutorial Properties...", in the left pane select "Linker" and "General". Click in the value field for "Additional Library Directories" and add the path to the 32-bit version of "canlib32.lib", in my case "D:\CanlibSDK\CanlibSDK_5.26\Lib\MS" (default is "C:\Program Files (x86)\Kvaser\Canlib\Lib\MS"). Now press Apply.
We repeat the process for the 64 bit version by selecting "x64" as the "Platform" and enter (after reopening the CANlibTutorial properties) "D:\CanlibSDK\CanlibSDK_5.26\Lib\x64" (default is "C:\Program Files (x86)\Kvaser\Canlib\Lib\x64") in the field for "Additional Library Directories". Press OK to save and close the properties.
The last step is to add #include "canlib.h" to CanlibTutorial.cpp. We do this as well as enter some more code...
To run the code, select platform from the drop-down menu, and press the green play icon.
